Android自定义View之刻度尺
背景
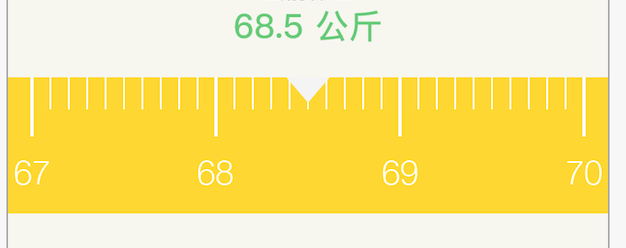
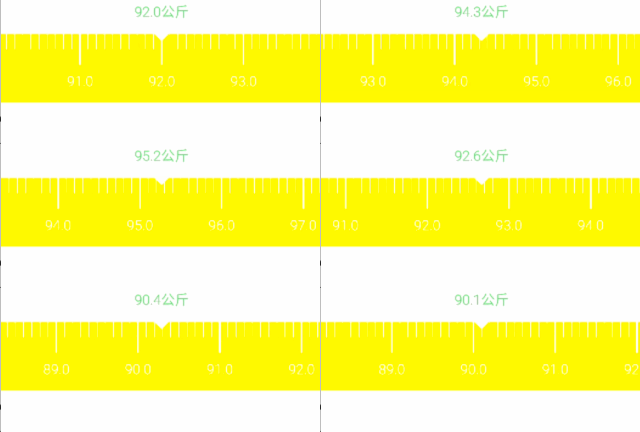
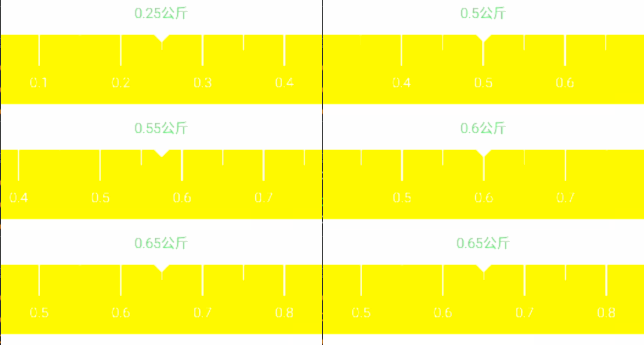
项目中之前用的纵向滚轮用于选择身高体重之类的需求,新版设计要求用横向刻度尺控件来实现,效果图,上面的字不在刻度尺范围内,是一个TextView。

自定义控件对于Android开发者来说是必备技能,这篇文章就不讲自定义View的基础知识了,主要谈谈绘制逻辑。
实现
遵循自定义View的开发流程,onMeasure() –> onSizeChanged() –> onLayout() –> onDraw()。由于我们要自定义的是View而不是ViewGroup,所以onLayout()就不用实现了。
onMeasure() 测量
onMeasure()用于测量View的大小,View的大小不仅由自身决定,同时也受父控件的影响,为了我们的控件能更好的适应各种情况,一般会自己进行测量。刻度尺View左右是满屏的,偷个懒宽度就不适配了,只做高度测试就好了。高度包括长刻度的高度,加上字和底部间距
1 2 3 4 5 6 7 8 9 10 11 12 13 14 15 16 17 18 19 20 21 22
| @Override protected void onMeasure(int widthMeasureSpec, int heightMeasureSpec) { setMeasuredDimension(measureWidth(widthMeasureSpec), measureHeight(heightMeasureSpec)); } private int measureHeight(int heightMeasure) { int measureMode = View.MeasureSpec.getMode(heightMeasure); int measureSize = View.MeasureSpec.getSize(heightMeasure); int result = (int) (bottomPadding + longLineHeight * 2); switch (measureMode) { case View.MeasureSpec.EXACTLY: result = Math.max(result, measureSize); break; case View.MeasureSpec.AT_MOST: result = Math.min(result, measureSize); break; default: break; } height = result; return result; }
|
onDraw() 绘制
1 2 3 4 5 6 7 8
| @Override protected void onDraw(Canvas canvas) { super.onDraw(canvas); canvas.setDrawFilter(pfdf); drawBg(canvas); drawIndicator(canvas); drawRuler(canvas); }
|
绘制做了三件事情:
- 绘制背景色
- 绘制指示器
- 绘制刻度
只看下怎么画刻度,难点在于怎么确定刻度的坐标。首先高度的坐标是一样的,刻度指示器是在屏幕正中,指示某个值,那么该刻度值的x坐标就是确定的。根据这个值去画其他坐标,包括长刻度和短刻度。
首先要确定每个长刻度(和短刻度,如果有的话)的坐标宽度和单位,确定基础单位和基础单位宽度(如果有短刻度以短刻度为基础单位)。那么
1
| 第i个刻度x坐标 = 中间刻度x坐标 + i * 基础单位宽度
|
其中i的取值范围在正负屏幕可绘制多少个基础单位,第0位就是屏幕正中的刻度值。以该值为基础一次画出可以在屏幕中显示的剩余刻度,如果是长刻度单位的整数倍就画长刻度,刻度值只在长刻度下画。
这样就有一个问题,正中刻度值必须是可以整除基础单位,比如,长刻度 = 1,中间两个短刻度,这样基础单位值就是0.5,currentValue = 0.3,那么下一个值就是0.8,但是这样显示并不是我们想要的,我们想要0、0.5、1、1.5这样的值。所以就是在初始化的时候格式化这些值,使得所有可显示的值都可以整除基础单位值,也就是余数为0。
由于使用float计算,所以要用到float精确计算,否则取余操作会出现不等于0的误差导致画不出长刻度。
1 2 3 4 5 6 7 8 9 10 11 12 13 14 15 16 17 18 19 20 21 22 23 24 25 26 27 28
| private float format(float vallue) { float result = 0; if (getBaseUnit() < 0.1) { result = ArithmeticUtil.round(vallue, 2); if (ArithmeticUtil.remainder(result, getBaseUnit(), 2) != 0) { result += 0.01; result = format(result); } } else if (getBaseUnit() < 1) { result = ArithmeticUtil.round(vallue, 1); if (ArithmeticUtil.remainder(result, getBaseUnit(), 1) != 0) { result += 0.1; result = format(result); } } else if (getBaseUnit() < 10) { result = ArithmeticUtil.round(vallue, 0); if (ArithmeticUtil.remainder(result, getBaseUnit(), 0) != 0) { result += 1; result = format(result); } } return result; }
|
处理滑动操作
滑动处理比较简单,以初始化为基础,每次move操作累加x坐标,以此值绘制偏移量,停止滑动时以基础单位宽度为基准四舍五入,开始动画滑动到相应的刻度值上。
主要方法
1 2 3 4 5 6 7 8 9 10 11 12 13 14 15 16 17 18 19 20 21 22 23 24 25 26 27 28 29 30 31 32 33 34 35 36 37
| private void drawRuler(Canvas canvas) { if (moveX < maxRightOffset) { moveX = maxRightOffset; } if (moveX > maxLeftOffset) { moveX = maxLeftOffset; } int halfCount = (int) (width / 2 / getBaseUnitWidth()); float moveValue = (int) (moveX / getBaseUnitWidth()) * getBaseUnit(); currentValue = originValue - moveValue; offset = moveX - (int) (moveX / getBaseUnitWidth()) * getBaseUnitWidth(); for (int i = -halfCount - 1; i <= halfCount + 1; i++) { float value = ArithmeticUtil.addWithScale(currentValue, ArithmeticUtil.mulWithScale(i, getBaseUnit(), 2), 2); if (value >= startValue && value <= endValue) { float startx = width / 2 + offset + i * getBaseUnitWidth(); if (startx > 0 && startx < width) { if (microUnitCount != 0) { if (ArithmeticUtil.remainder(value, unit, 2) == 0) { drawLongLine(canvas, i, value); } else { drawShortLine(canvas, i); } } else { drawLongLine(canvas, i, value); } } } } notifyValueChange(); }
|
关于刻度的单位,需要给出长刻度单位和中间的短刻度个数,这样中间的短刻度单位就确定了,所以理论上不管中间有几个短刻度计算都是一样的。我在里面封装了三个常用的,2、5、10三种。
支持的styleable
1 2 3 4 5 6 7
| <declare-styleable name="BooheeRulerView"> <attr name="ruler_bg_color" format="color|reference"/> <attr name="ruler_line_color" format="color|reference"/> <attr name="ruler_text_size" format="dimension"/> <attr name="ruler_text_color" format="color|reference"/> <attr name="ruler_width_per_unit" format="dimension"/> </declare-styleable>
|


代码在这里
总结
实现的效果比较单一,没有做太多的扩展,有时间再完善下。
转载请注明地址 w4lle.github.io
本文链接: http://w4lle.com/2016/05/15/Android自定义View之刻度尺/
版权声明:本文为 w4lle 原创文章,可以随意转载,但必须在明确位置注明出处!
本文链接: http://w4lle.com/2016/05/15/Android自定义View之刻度尺/

